
By J.E. Nickerson | Wise Thinkers Help Desk
So, picture this…
You finally got your big, beautiful WordPress site up and running. The pages are shining, your articles are rolling out, your images are chef’s kiss perfect — and the views are coming in. Life is good.
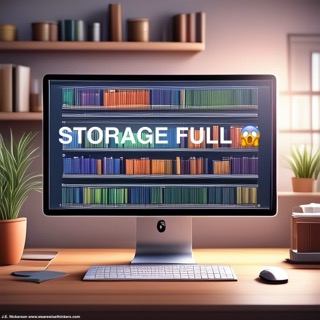
Then out of nowhere — BAM.
A dreaded warning: “You’re almost out of storage.” 😱
Wait, what?! Didn’t you choose the plan with “plenty” of space? How is this happening so fast?
Trust me, I’ve been there. But don’t worry. I managed to reclaim my precious storage space without upgrading my plan — and you can too.
Let’s walk through it, one stress-free step at a time.
⸻
Why This Happens (And Who It Hits Most)
This usually happens to creatives (like us!) who love visuals — uploading image after image directly into the WordPress media library. It’s tempting. WordPress even encourages it. But over time, those beautiful high-res uploads start to add up and quietly eat away at your storage.
So what’s the fix?
We’re going to offload your media, shrink your files, and link them externally like a boss.
⸻
Step 1: Offload Your Media
First things first: download your original files from the media library and store them on your own device or, even better, in the cloud. Think of it like spring cleaning for your website.
🗂 Create a filing system that’s easy to navigate. Something like:
→ Website Media
→ Blog Projects
→ Article Title
→ Related Images
This makes your life way easier later when it’s time to shrink, upload, and re-link.
⸻
Step 2: Honey, I Shrunk the Files!
Yes, I’m keeping this line — because it’s perfect.
Even after offloading, big media files will still slow down your site and count against your storage if you try to re-use them as-is.
🎯 Target file size: under 100KB if you can. Smaller = faster load times and happier visitors.
You can shrink image files using your device’s built-in tools or a free app. Then, save the smaller versions in your organized folders and label them clearly so you don’t mix them up with the originals later.
⸻
Step 3: Upload + Host Externally
Now that your files are all shrunk and sorted, you’re going to upload them to a free hosting site that gives you shareable links. I use PostImages.org — it’s simple and gives you direct links to use in your articles.
📝 Pro tip: Pick the smallest image size when uploading. It helps your pages load lightning-fast.
⸻
Step 4: Link the Images to Your Articles
Head back to your WordPress post.
Add an image block like usual, but here’s the trick:
• Select “Insert from URL”
• Paste your direct link from PostImages
• Position and adjust it as you like
Boom — your image appears in the article, just like before, but without eating up storage. Magic. ✨
⸻
Real Talk: It Saved My Website
Before doing this, my WordPress site was gasping for space — I had 1.5 GB clogging the media library. After offloading and shrinking my files, it dropped to just 65 KB. 😍
Why does this matter?
Because my plan only gives me 13 GB, and I didn’t want to shell out extra cash just for more room. This little workflow extended my site’s life and saved me real money.
⸻
A Word on “Attached” vs. “Unattached” Files
This part tripped me up.
In the WordPress media library, files can be marked as:
• Attached — linked to an article or page
• Unattached — floating around with no connection
I found it safest to bulk delete unattached files first to free up space fast — just double-check that you’re not deleting a file still used in a post. If you’re unsure, keep it until you relink the external version.
⸻
Where did my media for this article go?
When I looked through my articles to verify that the images appeared for my readers, I was surprised to see that some of the media files were missing. This was easily corrected by shrinking the original relevant media, uploading it to post images and then relinking it to my website. One way to keep this issue from happening is to create a short checklist (linked at the end of this article) and following it for each image you are working with. It’s a little tedious, but the peace of mind is worth it.
⸻
Final Thoughts (From One Creator to Another)
Running a website is a journey.
You’re going to mess some things up. That’s okay.
As writers, artists, makers — we’re always learning. Never beat yourself up for not knowing something sooner. Instead, celebrate that you learned it now.
Keep creating. Keep growing.
Your voice matters. Your work matters.
And your storage?
We’ve got that covered. 😉
Resources
Looking for help to optimize your website storage so you have more room for what you write? Read my newest resource
➡️Fix Your WordPress Storage 5 Easy Steps Checklist pdf
If you loved this article, you’ll love the rest of the Help Desk Resources designed for authors and creators who want to expand their reach and hone their skills.
Still trying to find time to focus on your writing? Maybe life‘s feeling a little bit too busy right now and you just need some time to get alone with your creative voice. Staying Focused on Your Writing When Life Feels Overwhelming is the article that will give you the confidence and inspiration you need in order to write your best work even when life is pulling you in every direction.
📚 And if you’re new here, I’m J.E. Nickerson — children’s author and inspirational storyteller. You can check out my books here or follow me on YouTube for more inspiration and encouragement on this writing life.
Discover more from We Are Wise Thinkers
Subscribe to get the latest posts sent to your email.

2 thoughts on “Running Out of WordPress Storage? Don’t Panic—Do This”
Comments are closed.